Wednesday, January 25, 2012

Kitchen Bookshelves

(this post was originally written on December 19th, 2010 and posted on my old blog server. I am moving it to my new blogger account.)


It has become necessary to begin a small woodworking project for the preservation of sanity. The kitchen needs a skinny, open frame book shelf for cook books and such to get them off the counter. I have quite a bit of lumber that needs to be used up for projects so a little complexity is added by having to make use of whats already taking up space in the garage. Some good pine 6 inches and some more that is 3 inches which I'll joint together for a 9 inch shelf which is wide enough for most of the cook books. It's a little skinny for stability but I can screw it to the back of a cabinet to make sure nobody pulls it over on themselves.


Used biscuit joints to join those 2 pieces together for the full width of the shelf. If I was buying lumber of the proper width this step wouldn't be necessary.


clamps are a bit big for these little shelves but I have enough of the bigger ones to do all 6 shelves at once. After they are clamped I ran them through the thickness planer to eliminate any differences between the 2 pieces and they feel much more like a single piece of wood except for the changes of grain. But those will be less obvious after finishing. My planer is a cheap one and it leaves a bit of a dwell as it goes in and comes out of the blades, if I had remembered this I would have made each shelf an extra 4" longer so that I could trim off the section that got that flaw, but it isn't too bad really, makes it look a bit more like recycled lumber and have some extra character.


After trimming the edges so they are the same finished size I ran them through the router table for a nice ogee edge. If I had planned ahead I might have added edge bocks to the outfeed side to avoid the little bit of tear out on that side, but only 1 actually looked bad enough to notice and I sanded them out fairly good.


The uprights are 4 1x2 hardwood pieces. Not just putting them on the 4 corners but adding a bit of character. The back ones are flush with the back, but stand proud of the edge far enough to clear the beading I'm going to route down each edge of the uprights. The front ones I started an inch back but the same amount proud as the rear ones. Since we loose an inch front to back the stability of the thing is further reduced, and it's going to be tall about 14" between each shelf as I want the top shelf to be high but it's going to be screwed to the cabinet anyway.


just checking the back cutouts. That upright isn't the final one, it's actually 3" wide instead of 2 and just a short scrap piece that I used to setup the beading bit in the router table. They look pretty good I thought.


Rough assembly. I thought about doing some fancy tenon joinery inside the cutouts, but that would have been difficult and this was a quick weekend sanity project. So after lining up just placed an inset screw through to hold the shelf. After this was dry I plugged the screw holes and sanded them flush. Almost invisible and yet still very strong.


The finish is a mahogany gel stain and spar urethane varnish. I dont normally like gel stains but this gave the pine a really nice dark and even finish that would not have been possible with a regular stain. Also I left some extra stain in the beading for further antiquing. It looks really nice and is only a little darker than the stain of the cabinets it's attached to.


The natural uneven take up of even the gel stain made the wood look much more interesting, I like the effect on the uprights very much. I could have reduced this with a pre-coat of a 3 pound cut shellac prior to staining, this is a great technique for any non-hardwood you're finishing with any stain but it would have added an extra day to the project, and it really does look good the way it came out.


screwing it to the side of that cabinet makes it rock solid. Another detail was a little 1 inch cutout at the bottom of the back upright. This lets it sit flush instead of against the quarter round molding that runs along the bottom of the cabinets. All in all I'm very happy with it, the spousal approval level is high for a short duration very inexpensive project and it looks great.

(notes from the future: I love these shelves.)

Multimeter Support for XTension

(having just witnessed the state of the union address I can post this historical article with the greatest pride in the congressional tradition of repeating past mistakes and ignoring the similar results... The difference being that at the end I’ll tell you what has changed and give necessary updates. This post originally appeared on my server on August 26th, 2010 and is being moved manually to this new blogger account as I deem it of some value.)


When I learned that there were multimeters out there that had documented serial protocols I added that to my todo list for XTension support. I bought this one from radio shack more than a year ago and never got around to looking at it in any detail. Now with the kids just starting back at school and having just unearthed the protocol docs it was time to do something about it while I refreshed my memory on the code I haven't touched in months while I played with the kids over the summer. This is just first light, it's not quite beta ready yet but it's talking to XTension and updating a unit value in the database for the displayed value. Here is my Radio Shack model 22-812 multimeter with an FTDI usb/serial adaptor sticking out of the top and a View in XTension showing the value.


(wisdom from the future: Since this beta I have revisited the code several times. It now has a significant change setting that you can setup in the interface settings as well as following automatically the type of thing being measured so that it displays, ACV or DCV etc. A problem remains in re-syncing after a restart if the device was sending data throughout the downtime, there may be garbage in the buffer that confuses it. If this happens just turn off the serial output from the device, restart the interface in XTension and restart the serial stream. I use this to measure line voltage fluctuations here and graph them opposite my amperage usage as measured in my main panel. It’s interesting to watch the electric company kick in and drop out auxiliary generating capacity at times of high load.


The plugin for this remains as part of the standard XTension distribution as I don’t consider it out of beta as only about 2 people are using it besides myself... Once I fix the resync issue it will probably become part of a commercial data acquisition plugin for XTension. For the moment though you can experiment with it for free.  1/25/12)

Tuesday, January 24, 2012

LED Under Cabinet Lights


(repeating the past... I am moving this post manually from my old server to blogger. This was originally posted on August 11th, 2010)

Really nice new house, but the lights under the cabinets are so ancient that the tubes actually have a starter and click click light BZzzzzzz. Totally unacceptable! Good under cabinet fixtures, even of the regular florescent type (and I have no interest in the halogen type, too hot and wasteful not to mention continual bulb changes) are very expensive, upwards of $50 a light and more for the wider ones. Little LED ones are available but they are even more expensive but not nearly as bright. Current limited power supplies for LED's are available now directly from china at pretty decent prices and one watt warm white LED's are not that expensive anymore either so I tried to roll my own to replace the lights here.

The power supply is a 7 to 12 LED driver from dealextreme.com and the LED's are from them too. All you have to do is solder them in series and glue them to a heat sink. But that is not as easy as it sounds...

I decided to reuse the fixture cases already wired in under my sink, the power supply is small and will easily fit in them. I used a piece of u-channel aluminum an inch or so shorter than the length of the bulb that used to be in the fixture and arranged the LED's upon it.

First lesson learned: The wire I used was too thick. It's just a watt of power so thinner wire would have been fine and would have made it much easier to manage during the glue up portion.

Here's the channel with the led's being held down while the epoxy cures with blue tape.


as it turns out, blue tape could not hold them in place with the resistance from the overly heavy wire I used and none of the glued flat. Heat kills LED’s they must have good attachments to the bar or they will dim early.


So I pried them all off and began again, this time using one of these blue clamps which have cutouts in the face just about the right size to cradle the lens on the LED without breaking it. So now they are all glued on right and they are really quite impressively bright even without any lenses.


I just screwed them into the same case as the old lamp, replacing the ballast with the new power supply. They are quite a bit brighter than the old lamps and are a superior color temperature the heat sink gets warm to the touch but never so hot that you couldn't hold it which means that either I"m not making good thermal contact with the LED's and they will shortly self destruct, or that it's working great and well within thermal limits for long life.

Putting the diffusor back over them though reduces the output considerably, so for now I've left it off. You can't see them under the cabinet anyway, but I need to figure out some better ways to make it pretty before I replace the rest of them.

(letters from the future: I ended up building 4 of these for under the 2 countertop areas they are terrific. The light maintenance hasn’t been 100%, probably down to 80% and then stopped degrading in any way I could notice in the last year. One LED burned out for some unknown reason in the middle of one array, I replaced it and it came back to life. One power supply stopped working and was replaced with a newer version from DealExtreme with similar specs. I am very happy with them still!)

XTension Controlled LED Nightlights

(Following in the long standing and honorable tradition of repeating the past I am moving some posts from my old server to blogger. This post was originally written on April 27th, 2010.)


First project in the new house worth documenting is the install of some X10 controlled LED nightlights. These got (future james: and still do!) a very high level of spousal approval.


XTension support for Weeder Analog Output module

(Following in the long and honorable tradition of repeating the past I am reposting some posts from my original projects blog to blogger. This post originally appeared on December 7th, 2009)


weed tech makes some nice interface modules, several of which I already support in XTension. Something I've been meaning to get ahold of is their analog output card so that I might make use of some of these old meters that I've collected. I broke down and bought myself the thing the other day ;) I had to revisit the code anyway to support serial connections over IP/serial adaptors and add support for their new analog input module anyway so I decided to add this to the list of maintenance being performed.


(letters from the future: I’m not sure that anybody other than me has found a use for this card, but I love to have the meters sitting around showing something vaguely useful. The support is included as part of the regular weeder plugin for XTension the demo version of which is included with the standard download as linked to above. The full weeder IO module support page is at the wiki site)

Adafruit “Ice Tube” VFD Clock Kit

(Following in the long standing tradition of repeating the past I am manually moving some of my previous blog posts to blogger. This post was originally written on October 13th, 2009)


As if there weren't enough displays and readouts in here already today I completed the VFD "ice tube clock" from Adafruit It's actually not at all a hard kit to put together and it looks really nice on my desk :) The quality of the plastics and board and instructions are just second to none. This was about a 2 hour project for me, I'm sure other folks could do it faster. I have only 2 pieces of advise, use the thin solder, not the thick old radio shack kind and though they say some of the plastics can be installed either way around, it actually will only fit one way, so dont force it, try it the other way around. the tolerances are very close due to the quality of the laser cutting.

(letters from the future. This clock is still happily keeping time on my desk. I wish there was a setting for “do not flash to tell me there was a power failure, I already know there was a power failure thank you!” but otherwise great fun. Clock kits have become a bit of occupational therapy for me I seem to be building more and more of them...)

Monday, January 23, 2012

Setting up the Barix Barionet with XTension

Back in 2009 I did this recording of the steps to setup and connect the Barix Barionet 50 to XTension. The Barix devices are digital/analog IO devices that I am very fond of. They connect to your system via ethernet and provide remote serial ports for the connecting of serial devices, lots of digital IO for remote monitoring and control and also a 1-wire bus for temperature monitoring. They also do a lot more beyond the scope of this video and at a very reasonable price.


Yet Another AppleTV Upgrade Strategy

(following in the long tradition of repeating history I am manually moving some of the potentially useful or particularly dear to me blog posts from my server to blogger. This entry was originally posted on May 12th, 2009 and may still be of interest)


I purchased an AppleTV when they first came out as it was perfect for playing all the kids movies which were on DVD's that were becoming increasingly scratched and getting lost. Sadly I discovered that the internal drive was less than adequate to hold them all, but luckily I have a house server running all the time anyway for 
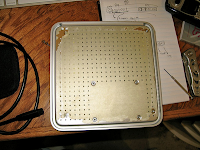
XTension anyway so setting up streaming was no big deal. The interface for finding the streamed videos is less than perfect and the kids sometimes have trouble finding things but it does work. Lately though I've taken to lugging the AppleTV along with us on vacations and trips to hook to hotel or relatives TV's so it's necessary now to get as much of that stored locally as possible. The disk drive inside is a regular 2.5" IDE (note: NOT SATA) drive and can be fairly easily replaced physically by anybody with a set of torx drivers. Other people online have described it as stuck to the case via a pice of foam tape like stuff that was easy to remove. Mine was NOT easy to remove. After removing the screws it stayed stuck tight so much so that I was worried about damaging the drive to pry it loose. I finally resorted to using a small screwdriver to push through the mounting holes one after another working around and around until it finally came loose. Save that piece of foam as you'll need it when replacing the next drive to keep the metal case from shorting against the bottom of the disk controller board if it should flex at all. Now the problems started. the disk has a very interesting partition setup that cannot be easily re-created or altered with the regular OSX partitioning tools. If you simply image the entire disk via the "dd" command as engadget and others suggest and restore to a larger disk then disk utility will refuse to resize the Media partition as the partition table is too small to allow it. If you use "gpt" from the command line as they suggest it will do it, but it will create a corrupt partition that overlaps other data and the disk will become corrupt and have to be reformatted. What I finally had to do was to image the individual partitions on the disk separately, manually from the command line create the appropriate partitioning on the new disk and then restore the images to it. this is not complicated really, just involves some typing at the command line, but if you do these things to the wrong disk you will totally destroy whatever disk is connected to your system. So be sure to follow those instructions to make sure you're working on the right disk! First thing to do is to connect the original AppleTV disk to your Mac via some kind of IDE to USB or Firewire adaptor. I used an old firewire portable case that used to hold the disk I was replacing it with. When you connect the old drive 2 partitions will mount on the desktop, "OSBoot" and "Media" for this example I'm not going to preserve the "Media" directory, but you can do that if you wish to save whats on it, I decided that would take too long and just resynced over night after I got it working again. In addition to the 2 mounted partition the disk has 2 others that need to be imaged and moved to the new disk. The first partition is called "EFI" and is the firmware or bootloader or other such. The second holds the factory restore information so that you can boot into restore mode and rebuild the OSBoot partition if that ever becomes corrupted. You do not actually HAVE to restore the restore partition, the machine will run without it, but you'll be sunk if you ever need it. The finder will continue to remount the OSBoot and Media partitions as we work so you'll have to eject them after about every step or get errors that the disks are in use.

Step 1: figure out what the disk entry is

If you have only 1 disk on your system, and no images or other things mounted then your boot disk will be called disk0 and the newly mounted apple tv disk will be called disk1. If you have other disks mounted first they will get the lower numbers. You can figure out for sure what the disk number is by running the command diskutil list in the terminal. The output will look something like this:


[pasta:~] james% diskutil list
/dev/disk0
   #:                       TYPE NAME                    SIZE       IDENTIFIER
   0:      GUID_partition_scheme                        *465.8 Gi   disk0
   1:                        EFI                         200.0 Mi   disk0s1
   2:                  Apple_HFS Meteor                  465.4 Gi   disk0s2
/dev/disk1
   #:                       TYPE NAME                    SIZE       IDENTIFIER
   0:      GUID_partition_scheme                        *298.1 Gi   disk1
   1:                        EFI                         200.0 Mi   disk1s1
   2:                  Apple_HFS BigMedia                297.8 Gi   disk1s2
/dev/disk2
   #:                       TYPE NAME                    SIZE       IDENTIFIER
   0:      GUID_partition_scheme                        *37.3 Gi    disk2
   1:                        EFI                         34.0 Mi    disk2s1
   2:             Apple_Recovery                         400.0 Mi   disk2s2
   3:                  Apple_HFS OSBoot                  900.0 Mi   disk2s3
   4:                  Apple_HFS Media                   35.8 Gi    disk2s4


in my case the /dev/disk2 entry is the AppleTV disk, you can see 4 partitions listed, EFI, Apple_Recovery, Apple_HFS OSBoot and Apple_HFS Media. The whole disk is mounted as disk2 in my case, and the other partitions are given names like disk2s1, disk2s2 etc... we're going to make images of the EFI, recovery and OSBoot partitions next given the disk number as 2.
Step 2: Image the necessary partitions

As of this writing all AppleTV's in the wild appear to be the same as far as what the partitions are numbered and sized. This could change however so if your output from the diskutil list command is too different from mine you may have to change the partitions numbers I'm using in order to get things to work. now we're going to image the first 3 partitions or the disk, assuming that the disk2s1, disk2s2 and disk2s3 are the same on my system as yours. They should be as long as the AppleTV versions aren't too different. Some tutorials out there suggest that it is necessary to run all these commands below through "sudo" if you get permission errors when running them that aren't caused by the disks being mounted just add "sudo" before each command and enter your password when it asks. we'll use the command line dd command to do the image saving and restoring. eject the disks by typing:

diskutil eject disk2

image the EFI Partition:
dd if=/dev/disk2s1 of=./efi.dmg bs=1024k

saves the entire partition to a disk image file called efi.dmg in the current working directory, you can change that path if you'd like it somewhere else. 

Image the apple recovery partition:
dd if=/dev/disk2s2 of=./recovery.dmg bs=1024k

image the OSBoot partition:
dd if=/dev/disk2s3 of=./osboot.dmg bs=1024k

Step 3: Partition the new disk

This is where things get tricky and where the other tutorials fell down for me. So we're going to completely destroy the partition on the new disk and create a new one from scratch. Unmount and remove the old AppleTV disk and connect and mount your new disk. It will probably already be formatted and will mount to the desktop, if you get the finder popup asking what you want to do with this unformatted disk just click "ignore" what we're doing here would completely destroy any other disk and data that you might have connected if you operate on the wrong disk number. Again verify that you've found your new disk by using the diskutil listcommand. If you didn't change any other disk mounting between ejecting the AppleTV disk and putting the new one on it will probably be the same. If need be eject the new disk, run the command, then re-connect it and see what changed that will show what the new disk is. If you get it wrong you'll destroy the wrong disk! in the command line you'll have to unmount it if it mounted by entering:
diskutil eject disk2

now we're going to totally wipe out the partition table on this new disk and start from scratch:
gpt destroy /dev/disk2
and create a new partition table:
gpt create /dev/disk2

Once you start creating partitions the finder may try to do something with them so you should run the diskutil eject disk2 between each of the following. This is also very similar to what the tutorials on Awkward TV suggest but very different from the Engadget tutorial. It is a good idea to say again at this point that as of this writing all disks in AppleTV's in the wild are the same and that these sector numbers shoudl work for everything as of this time. Future upgrades to the hardware might change these numbers. 

Create the EFI partition:
gpt add -b 40 -i 1 -s 69632 -t efi /dev/disk2

eject the disk again if necessary Create the recovery partition. This one is odd, I dont know if it's actually necessary to give it the same ID number as in the examples, but doing it this way did work so thats what I'll pass on again:
gpt add -b 69672 -i 2 -s 819200 -t 5265636F-7665-11AA-AA11-00306543ECAC /dev/disk2

eject the disk again Create the OSBoot Partition:
gpt add -b 888872 -i 3 -s 1843200 -t hfs /dev/disk2

eject the disk again create the new Media partition. This is the one that you need to calculate the size of to use the whole new disk. Thats not hard to do though as the size of the empty space can be shown by the gpt command. So at this point show the partitions on the disk:
gpt show /dev/disk2

the output will look something like:
gpt show disk1
      start       size  index  contents
          0          1         PMBR
          1          1         Pri GPT header
          2         32         Pri GPT table
         34          6         
         40      69632      1  GPT part - C12A7328-F81F-11D2-BA4B-00A0C93EC93B
      69672     819152      2  GPT part - 5265636F-7665-11AA-AA11-00306543ECAC
     888824    1843192      3  GPT part - 48465300-0000-11AA-AA11-00306543ECAC
    2732016  309849759         
  312581775         32         Sec GPT table
  312581807          1         Sec GPT header

see the 3 indexed "GPT parts" and following that an empty line before the "sec GPT Table" that is where we'll get our start and size parameters for creating the full sized media partition. So in my case as above the -b (begin) parameter is 2732016 and the -s (size) parameter would be 309849759. So the command would be:
gpt add -b 2732016 -i 4 -s 309849759 -t hfs /dev/disk2

Since we're not restoring the media partition we need to reformat it as a standard HFS+ volume and we can do that here, eject the disks first though "diskutil eject disk2”
newfs_hfs -J -v Media /dev/disk2s4

the -J tells it to use journaling and the -v passes the volume name which needs to be Media. and eject the disks again before continuing.

Step 4: Restore the image files

we need to put back the data from the efi, apple recovery and osboot partitions. We made the partitions above but they are empty so we'll put those image files we made in step 2 back into them. If you used different names for the dmg files we created above or put them in a different place you'll have to use the appropriate names and paths different from the example below. First the efi partition:
dd if=./efi.dmg of=/dev/disk2s1 bs=1024k

eject the disks again "diskutil eject disk2" Then the apple recovery partition:
dd if=./recovery.dmg of=/dev/disk2s2 bs=1024k

eject the disks again "diskutil eject disk2" Finally the OSBoot partition:
dd if=./osboot.dmg of=/dev/disk2s3 bs=1024k

This time you DONT have to unmount the disks as the next, and last, thing we have to do to this is remove the spotlight index files as they can evidently cause problems when placed back into the apple tv.

Step 5: Remove the Spotlight Index Files
Spotlight will try to index these new disks as they are mounted. It will create files at the root level of each one called ".Spotlight-vt100" and you need to delete those. You can do it from the finder by turning on the show invisibles option and just dragging them to the trash (it may ask you for your password) or you can do it from the command line by switching to those directories like cd /Volumes/OSBoot and then doing
rm -R ./Spotlight-vt100

Careful with that -R switch there, if you enter the wrong path it will delete all the way up any folder hierarchy without asking you any questions. So if in doubt use the finder. You may also wish to delete the .com.apple.timeMachine.supported file and the .fsevents file. That is used by timemachine and the system to write file system events to so that it knows what files changed. But AppleTV doesn't use it so it's a waste of space. Probably have to leave the .Trashes file that is there, that might be important, at least it caused no trouble for my own system. I removed the 3 above only. Now eject the disk, re-insert into the AppleTV remembering to put that piece of green foam tape like material under the new disk to keep the circuit board from shorting against the metal back and close it up. It took a few moments longer for mine to reboot after putting in the new disk, perhaps it knew things had changed and was running fsck or something. But it did come up. I had to re-pair with my iTunes library, but it was back up and running very quickly. Now with 150 gig drive, I could have gone larger but I had this disk here not really being used for anything so this upgrade was free except for the hours it took to sort out the myriad of tutorials out there. The Engadget tutorial that got me started and then failed at the creating of the new media partition is here A really good page bringing together many things that I used above is here

(notes from the future: That AppleTV is still running happily and I plan to keep it for as long as it will keep running. The older AppleTV models have a couple of advantages over the new ones not including the onboard disk drive. You can hack them to watch hulu content and they have component video output instead of HDMI. You can set the output to 480i which is just component standard resolution video. So if you have an older TV that you still have somewhere that has component inputs then you can use this to play movies on it. We have one older TV that is so heavy that I couldn’t carry it out to throw it away if I wanted to, this lets me put off the inevitable a little longer.) 

Sunday, January 22, 2012

Built In Bookshelves

(following in the proud tradition of repeating history I am manually moving my old blog posts from my server to blogger. This post was originally written on October 3rd 2007)


Turning some wasted space into a little library nook for my daughter.


The front of our house has 3 little gable window bits jutting out from the roof. They look nice and pretty from the outside, but they are so skinny that they don’t provide much usable space on the inside. One of them opens into my daughters room and gives her a second window out the front, but it’s down this short skinny useless hallway like feature. It was dark (even with the window) and really too skinny to put any furniture in or to use for anything.

My first thought was to pull out the knee wall entirely, or at least push it back a few feet under the roof to increase the size of the room a bit. After careful consideration though I recalled my last few experiences trying to do drywall work. The framing is no big deal, these are not weight bearing walls, but the thought of purchasing some drywall and installing it and doing a good enough job taping and mudding it so that I wouldn’t be looking at it and cringing every time I walked into her room talked me out of that. So instead I decided on some built in bookshelves along the side wall instead.

I made a couple of experimental cuts into the wall to locate the roof angle. Each of the 3 shelves would go into a joist space up to the roof without messing with the studs at all. The height you see in the shelves was dictated by the roof angle. Each one ended up being 13 inches shorter than the previous one. So after measuring the height from the top of the floor molding to where it would hit roof and subtracting a quarter inch for my own inaccuracy, then doing the same for the width of the 3 joist spaces I set about building 3 plywood boxes.


The first joist space was a little skinnier than the other 2 which were standard 16” on center studs. I measured and then subtracted a quarter inch to give me some wiggle room, both for my own imperfect skills as well as the fact that they joists probably weren’t exactly straight all the way down either. An 8th on each side can be easily shimmed and then covered by molding.

The only other complicated part of the boxes was the depth. I made the sides where it was going to be flush with the wall 3/4” longer so that they would come up and meet the drywall. The edges that were going to meet the studs and be covered with internal moldings I made 3/4 short so that they would not stick up past that. You can almost see it in that picture where the tops are a little longer than the sides in the middle one, and longer than just the outside sides on the others.

The holes to hold the shelf support things were fairly easy. I purchased a piece of pegboard and just clamped it inside the case and drilled through each hole down a row. This made sure they were straight and even. As long as you clamp it down the same amount on each side they will line up for level shelves. I didn’t have to make any special preparations to install them. I just cut the appropriate size holes in each joist space, removing the drywall bits still clinging to the joists in the middle and screwed them to the joists.
I’m actually pretty proud of the molding. I’ve never really gotten my miter box to cough up decent 45 degree angles, but I’m getting the hang of it. I had to build out the crown molding and add those side pieces to it so that the side molding pieces would be even with the bottom of it instead of proud of it if I hadn’t done that, so there was some extra work there.

The side moldings are just regular, pre primed stuff from the hardware store. The moldings down the middle between the boxes are custom made and run through the router to round the edges and put those coves down them. They had to be custom since they needed to be the correct width to cover the stud which still runs between the shelves and cover the plywood up to flush with the inside of the box.

One tool that I will never again be without when doing molding is my nail gun! My mom sometimes buys me tools for my birthday ;) And last year I got a little compressor and nail gun kit with her help. In learning to use it I learned that the longer nails really dont like to go where you want them to, they can bend along the grain and pop out on the totally wrong side of the piece rather than go straight. You really do have to pay attention to the grain and adjust the angle you’re shooting at. But for shorter brads to hold on a molding while the glue sets they are the ideal tool.

Here’s the final product after repainting the room from the nasty light green to a nice bright yellow as well. I added that light sconce as well. When the wall was open it was easy to get power from the outlet on the other wall inside the attic space and route some new romex to that switch and then up to the light. That lamp is above the roofline, so I had to use an old work box and push the romex up behind the insulation, but it wasn’t very difficult. The dangers of doing your own electrical work, as well as when using the aforementioned nail gun are beyond the scope of this little article...


Sending Nulls to stdout in REALBasic

(notes from the future: This is a historical repost of an article that I wrote on October 3rd, 2007. )


While writing a CGI application in REALbasic I noticed that I could not return an image. Something in the binary data was causing the data to truncate and get corrupted. Some investigation revealed that if the string you’re printing for output contained null characters, and pretty much any binary data does, it would hang up and never make it through. The solution was to link directly to the system frameworks on the Mac and write to stdout directly, not through RB’s print statement. This sounds straightforward but I have more experience with C on regular unix than the mac and it turns out you can’t just link in LibC in this way, you have to find the Cocoa/Carbon framework file. The declare in REALbasic to do this is:


soft declare function write Lib "System.Framework" (FileNo as integer, TheData as Ptr, BytesToWrite as integer) as integer 


Which you could pass a memory block to like this:

i = write( 1, m, m.size)

Potential problems are my assumption that the file handle for stdout will always be 1, but so far it hasn’t been wrong for anything I’ve used this for. 

(notes from the future: It’s possible that this bug has long since been fixed in RB as 2007 was a long time ago.  The bugs database has changed a couple of times since then and I can’t find any record of my original report of this so I don’t know. Just keeping the documentation alive in case anybody else should have similar problems.)

Box Shelves

(In the time honored tradition of repeating history I am manually moving old blog posts that I still deem of any worth from my old server to blogger. This entry was originally written on October 11th, 2008)


The family room here was getting a little overrun and there just wasn’t any good place to store anything. I quickly learned that a set of these shelving units in any quality material would set us back more than a grand! So I decided that I needed more projects and set about to build some.


There are 3 units, above arranged in an L shape dividing the room into the TV room behind them and the playroom on the other side. I had done an almost identical, but white painted, set of these 2 years ago for my nephew so I already had a bit of a head start on the layout but I decided to add in some improvements. The base cabinets here would be large drawers and I wanted to make the entire thing out of actual wood (or at least plywood with a good veneer for finishing) which would complicate the joinery a lot. I couldn’t use the same rabbit joints that I had on the previous one as the ply wood edges would show. Luckily since the last box making project I had invested in a few new power tools that would make it possible, a new table saw that was actually capable of cutting a straight line and a 45 degree bevel as well as my new pride and joy of the shop a Festool Domino joiner. Which was a ludicrously expensive loose mortise and tenon joiner but worth every penny as I don’t think I could have finished this project without it.


I dont have any good drawings or plans, the design was basically copied from a catalog that my wife liked. I adjusted the size slightly to reduce waste in cutting from 4x8 sheets of oak plywood, but didn’t make any other major changes for the size anyway. I built the bottom cabinets first as they were the most complicated with the drawers. I had never tried to install drawer slides in anything before and I was a little nervous about it all coming out square enough to make them work. Here again the domino jointer came in terribly handy as it’s alignment was so close to perfect as to not matter.


Assembling the drawers was actually really easy. A dado to hold the bottom and 4 tenons in each side. Since the drawers were entirely internal I didn’t worry about fancy joinery here just a tenon supported butt joint. I did keep forgetting to adjust the depth of cut on the domino though. The tenons are longer than the depth of the plywood so I had to cut deeper into the side of the back piece than the face of the sides. And when you forget to adjust that you plow through the front... Luckily these ended up being either on the back of the drawer which nobody else will ever see or on the front and hidden behind the drawer front so no harm done. Better to get the hang of it here than on the main case pieces.


I can’t over state just how cool these joints are. The stuff just glues up beautifully and pulls all together perfectly. Here’s a shot of the inside after it’s all glued up and the clamps removed.


The challenge with the outside case was the edges. I didn’t want to do a lot of fancy edge work and I didn’t want the plywood edges to show and it all needed to look clean since it was going to end up in the middle of the room instead of against the wall. The pretty much limited me to doing a 45 degree angle and bring the edges together. The domino joiner came to the rescue here also. The fence has a setting exactly for this. All along the inside of this joint are tenons at an angle to mate the 2 together, and again it performed wonderfully. Holding the fence on the 45 degree cut was a little tricky and I blew a couple of them getting the hang of it, but it was easy to just add more. Then some glue and pound it all together and the tenons pull them together wonderfully. Still required a huge number of clamps, but the edges look really nice. The new table saw I added to the shop (garage...) for this helped too, the old contractor saw I had couldn’t cut a straight line without kickback much less a precise angle, but the new one was able to cut the angles and do it without too much tear out or anything. I was quite happy with it.


The kick plate I did with just 2 or 3 passes through the router and flat on the sides so that it would mate up with the ones on either side. The bottom of the case is also held in with dominos and is really strong without my having to mess with dados of the proper size to hold the plywood. It would have made the joint edge look better if it had been recessed into the sides, but I dont actually own a dado yet that can do this, so I compromised. The side moldings were also custom made on the router and are tacked on with my other favorite tool the air brad nailer. There are dominos along the front of the bottom into the kick plate as well to keep it from coming unglued if someone should step in the middle on it someday or something. Probably not necessary as the drawer will be on top of it.


The drawer fronts are a traditional framed panel. The edges I put a bead on with the router. I was forced to invest in a new powered miter box to accurately cut the 45 degree edges here, but when setup properly it did a really nice job, and again you see a domino tenon in there. A little glue and a few clamps brought the thing together beautifully!


There pictured with the domino jointer is the frame! After a lot of finishing and assembly I actually got around to mounting the drawers and giving them a test.


Full extension slides and I even measured close enough that they didn’t bind or leave excessive gaps! These drawers are big enough that you could curl up in one if you really wanted to. I couldn’t be happier with the way they turned out.


Here’s Ben testing out the structural capacity of the first one to be carried in finished by jumping up and down on it. He tucked in his own shirt for this picture too :)

The top pieces were easier in that they were smaller and I had already done quite a bit of the 45 degree joinery with the domino now, but were more complicated in that they had 45 degree joints on every face but the front. No bottom to leave flat and make things easier. I also discovered that it is not possible to assemble a 45 degree angle joint around an entire box like this by yourself with the tenons in. The top joint in them had to be left to be simply glued, but I dont think that will make them any less strong.

The inner divders and shelves were again butt jointed with the dominos providing the strength. If I were to do it over again i would invest in the dado blade to cut grooves for them, or perhaps a router bit of the correct size to cut the dados as you can tell they are butt joints if you look too close. No matter how careful I was with cutting the plywood that edge will never be perfect and even though most folks dont notice that, I know that it’s there.

Finished product though turned out terrific. Makes the room in there and makes me very happy. Even with purchasing that ludicrously expensive joinery tool though the entire project only cost a little more than purchasing something made out of particle board would have cost. And now I have the tools and the skills to move on to the next project.


(notes from the future: we’ve moved since these picts were taken. In the slightly smaller new house they are no longer together as a unit. 2 of them are in the kids workroom and the third in Ben’s room as his bookshelves. They still look terrific and the only things I’d have done differently would have been not to buy the plywood from Home Depot as it turned out to have many voids in the inner laminations that caused some cracking in the outer veneer, home depot carry lousy quality plywood?! Thats unbelievable! and I’d have been more careful watering those plants we put on top of them as water did run between the 2 in the middle messing up that finish. I couldn’t see it the way they were in the old house and wasn’t aware of it, but in the new positions I see it all the time and am eventually going to get around to sanding it a bit and applying from fresh finish.)

A Few Notes On Color Temperature

(Historical Blogging: in the time honored tradition of repeating history I am moving entries worth moving from my old self hosted server here to blogger. When I’ve got that sorted out I’ll add new content here. This post was originally posted to sentman.com on March 11, 2009)


In the distant past light bulbs came in only 1 color, incandescent. Now days there are some bulbs coming in a variety of color temperatures and others that don't even bother to list on the package what it is. This is the main reason that compact florescent bulbs took so long to catch on in the US as people hated the color of the things. Now it's possible to get bulbs that you like if you do a little experimentation. I would not buy a case of CFL or LED bulbs without buying 1 first to see what you like. Specific color temperatures are measure in degrees kelvin, which i believe is the color of light as radiated from a black body at that temperature or something like that. The lower end of the numbers start around 2700k which is considered "warm" white. The "bright" white that you'll see are generally in the 3000k to 3500k range. And then the "daylight" white which can be as high as 6700k

"Warm" whites.
A 60 watt regular bulb looks to me right at the 2700k mark. I have seen some CFL bulbs and some LED bulbs do this as low as 2000k and I think those are useless too. Many of the 2700k bulbs used to look more green than white. However, if you have just a few lamps you want warmer colors. In my experience with lower light levels you want them to be warmer. A single daylight bulb makes a room look like an overcast day where a single warm white bulb just provides regular light as we're used to. Most lamps that are unlabeled as to their specific temperature are warm whites. I would not go below 2700k if possible as they start to look orange or green depending on the phosphors used.

"Bright" whites.
My favorite CFL bulb is the 110 watt equivalent from Sylvania who's color temperature is 3500k. I have an array of these in the cans in the kitchen and because there are 8 of them they provide wonderful working light in there when they are on. The single lamp in the corner of the living room that provides just walk through light I would never use one in because the color is too higher. The higher the color temp the more light you need to make is useful.

In between bright and daylight there is a wide range of other offerings though you may not find them at your corner grocery. I have lots of C8 tubes in the garage at 5000k and a few whiter CFL's in other places that I like a lot. But again a single one would look like a cloudy day. If you need a lot of good worklight and don't like the blue industrial feeling of the daylight lamps then these bulbs are for you.

"Daylight" whites.
Personally I have no use for anything above 5000k, I just don't like it. Daylight white bulbs are generally in the range of 6000k to 6500k and range up to blue, bluer and horrid in my opinion. If you need a lot of worklight than an array of these might be to your liking. I would buy just one to see what you think of it before investing though. I know that people in other countries often tend to really like the cooler temperatures (even though they have higher temperatures, they are cooler ;) but I guess I am a victim of some kind of American indoctrination as I don't.

"Full Spectrum"
I understand what these are supposed to be... Looking at the actual spectrum of light emitted from any phosphor you'll find peaks and valleys. They dont emit in a straight line so some colors will be accentuated and others will be muted. A full spectrum bulb has specially made phosphors to try to emit more of a straight line across it's spectrum. They tend to measure higher in the color temperature too. I've experimented a bit with them and just dont see the advantage for the much higher cost. They will render colors better if you're trying to discern the differences between adjacent entries in the pantone color sheet, but for anything else I do not personally see any reason to use them over an array of 3500k bulbs which are wonderful to work under.

"CRI"
Many lamps will advertise their "CRI" or color rendering index rather than their color temperature. But this isn't really as useful as you wont know what the color of the lamp is, only how well it is at reproducing other colors. Again, as in the full spectrum bulbs, unless you're doing color reproduction where it matters, a high CRI is not necessary. A really low CRI though would be bad though.

Notes on LED bulb offerings:
LED's compound the problem again. A white LED is really a blue LED with a phosphor spread on top. Cheap or older white LED's are very blue because of this. Modern ones are solving this problem with better phosphor application and better phosphors but they still tend towards the daylight or worse unless specifically marked as warm. (and even then, as in those warm white floods from LOA I spoke of in a previous entry, they may be completely mislabeled) I've bought warm white LEd's that are orange, I've bought warm white led's that are pinkish, I've bought warm white led's that are greenish. The warms for LED's tend to be very warm, like a bulb dimmed to just glowing. The problem is they aren't standardized. The higher power LED's out there aren't even made knowing exactly what they are going to output when they are made, they are binned after production based on measuring the output. And the binning process adds to the cost. So most folks will just grab a handful and solder them in giving a wide range even within the same array. Just like in CFL bulbs you get what you pay for. Cheap LED lights will not last and will output blue light but only for a short time as they dim down to nightlight status. And while really good expensive LED lamps are out there, they are very expensive...

(letters from the future: looking back on this entry from 2012 I can only add that really good warm white LEd bulbs are now available for prices that wont put you in the cardiac ward. My personal favorites are the slightly odd looking yellow phosphor ones from Phillips that Home Depot carries. They are excellent, they output lots of light, they are indistinguishable color wise from an old fashion light bulb and they dim all the way to nothing smoothly. The 75 watt equivalent ones are still around $40, but for $25  you can get the 60 watt equivalent and $21 the 40. Get one and use it when some regular bulb blows, you wont be unhappy with it!)
.code { background:#f5f8fa; background-repeat:no-repeat; border: solid #5C7B90; border-width: 1px 1px 1px 20px; color: #000000; font: 13px 'Courier New', Courier, monospace; line-height: 16px; margin: 10px 0 10px 10px; max-height: 200px; min-height: 16px; overflow: auto; padding: 28px 10px 10px; width: 90%; } .code:hover { background-repeat:no-repeat; }